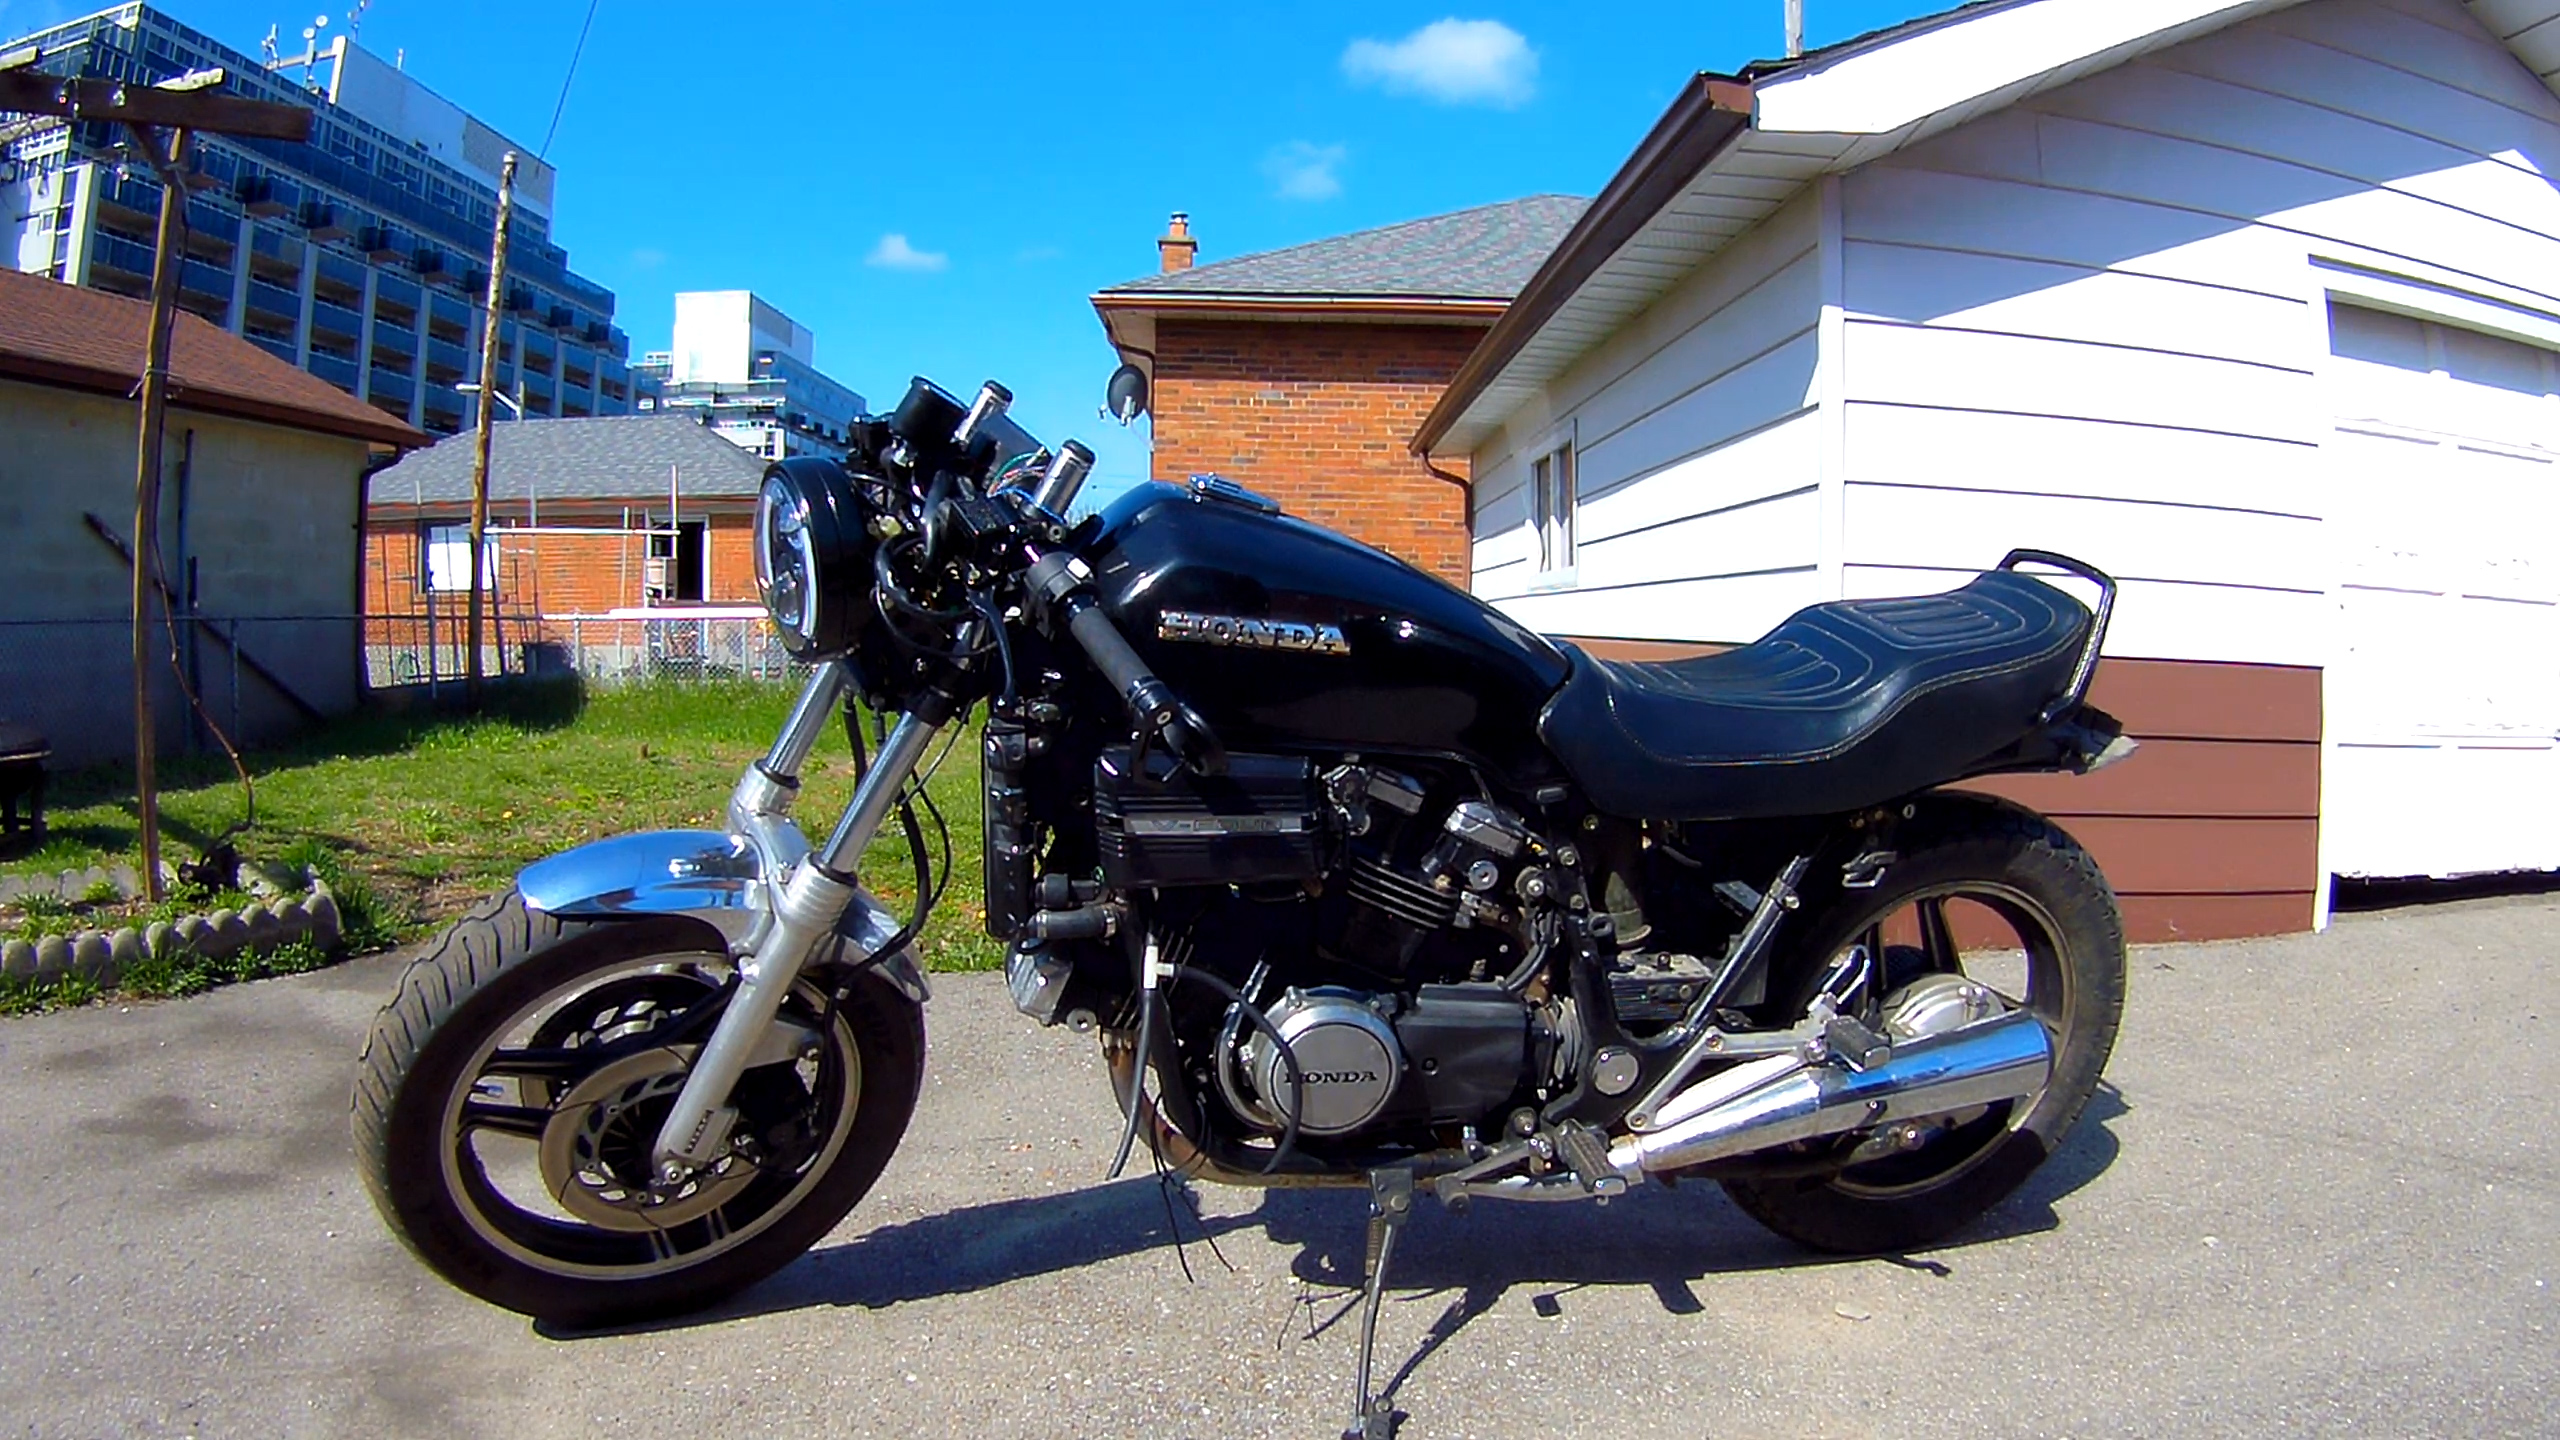
The winter in Toronto was annoyingly long, and me not having electricity in my garage certainly didn't help. There is also the small matter of the garage door freezing shut. Either way all that is over and I can finally continue working on the bike.
Lets start with a summary list of what has been done:
- New retro brake and clutch levers
- New switches
- Upgraded carburetors internals
- New CNC grips and throttle
- New bar end mirrors
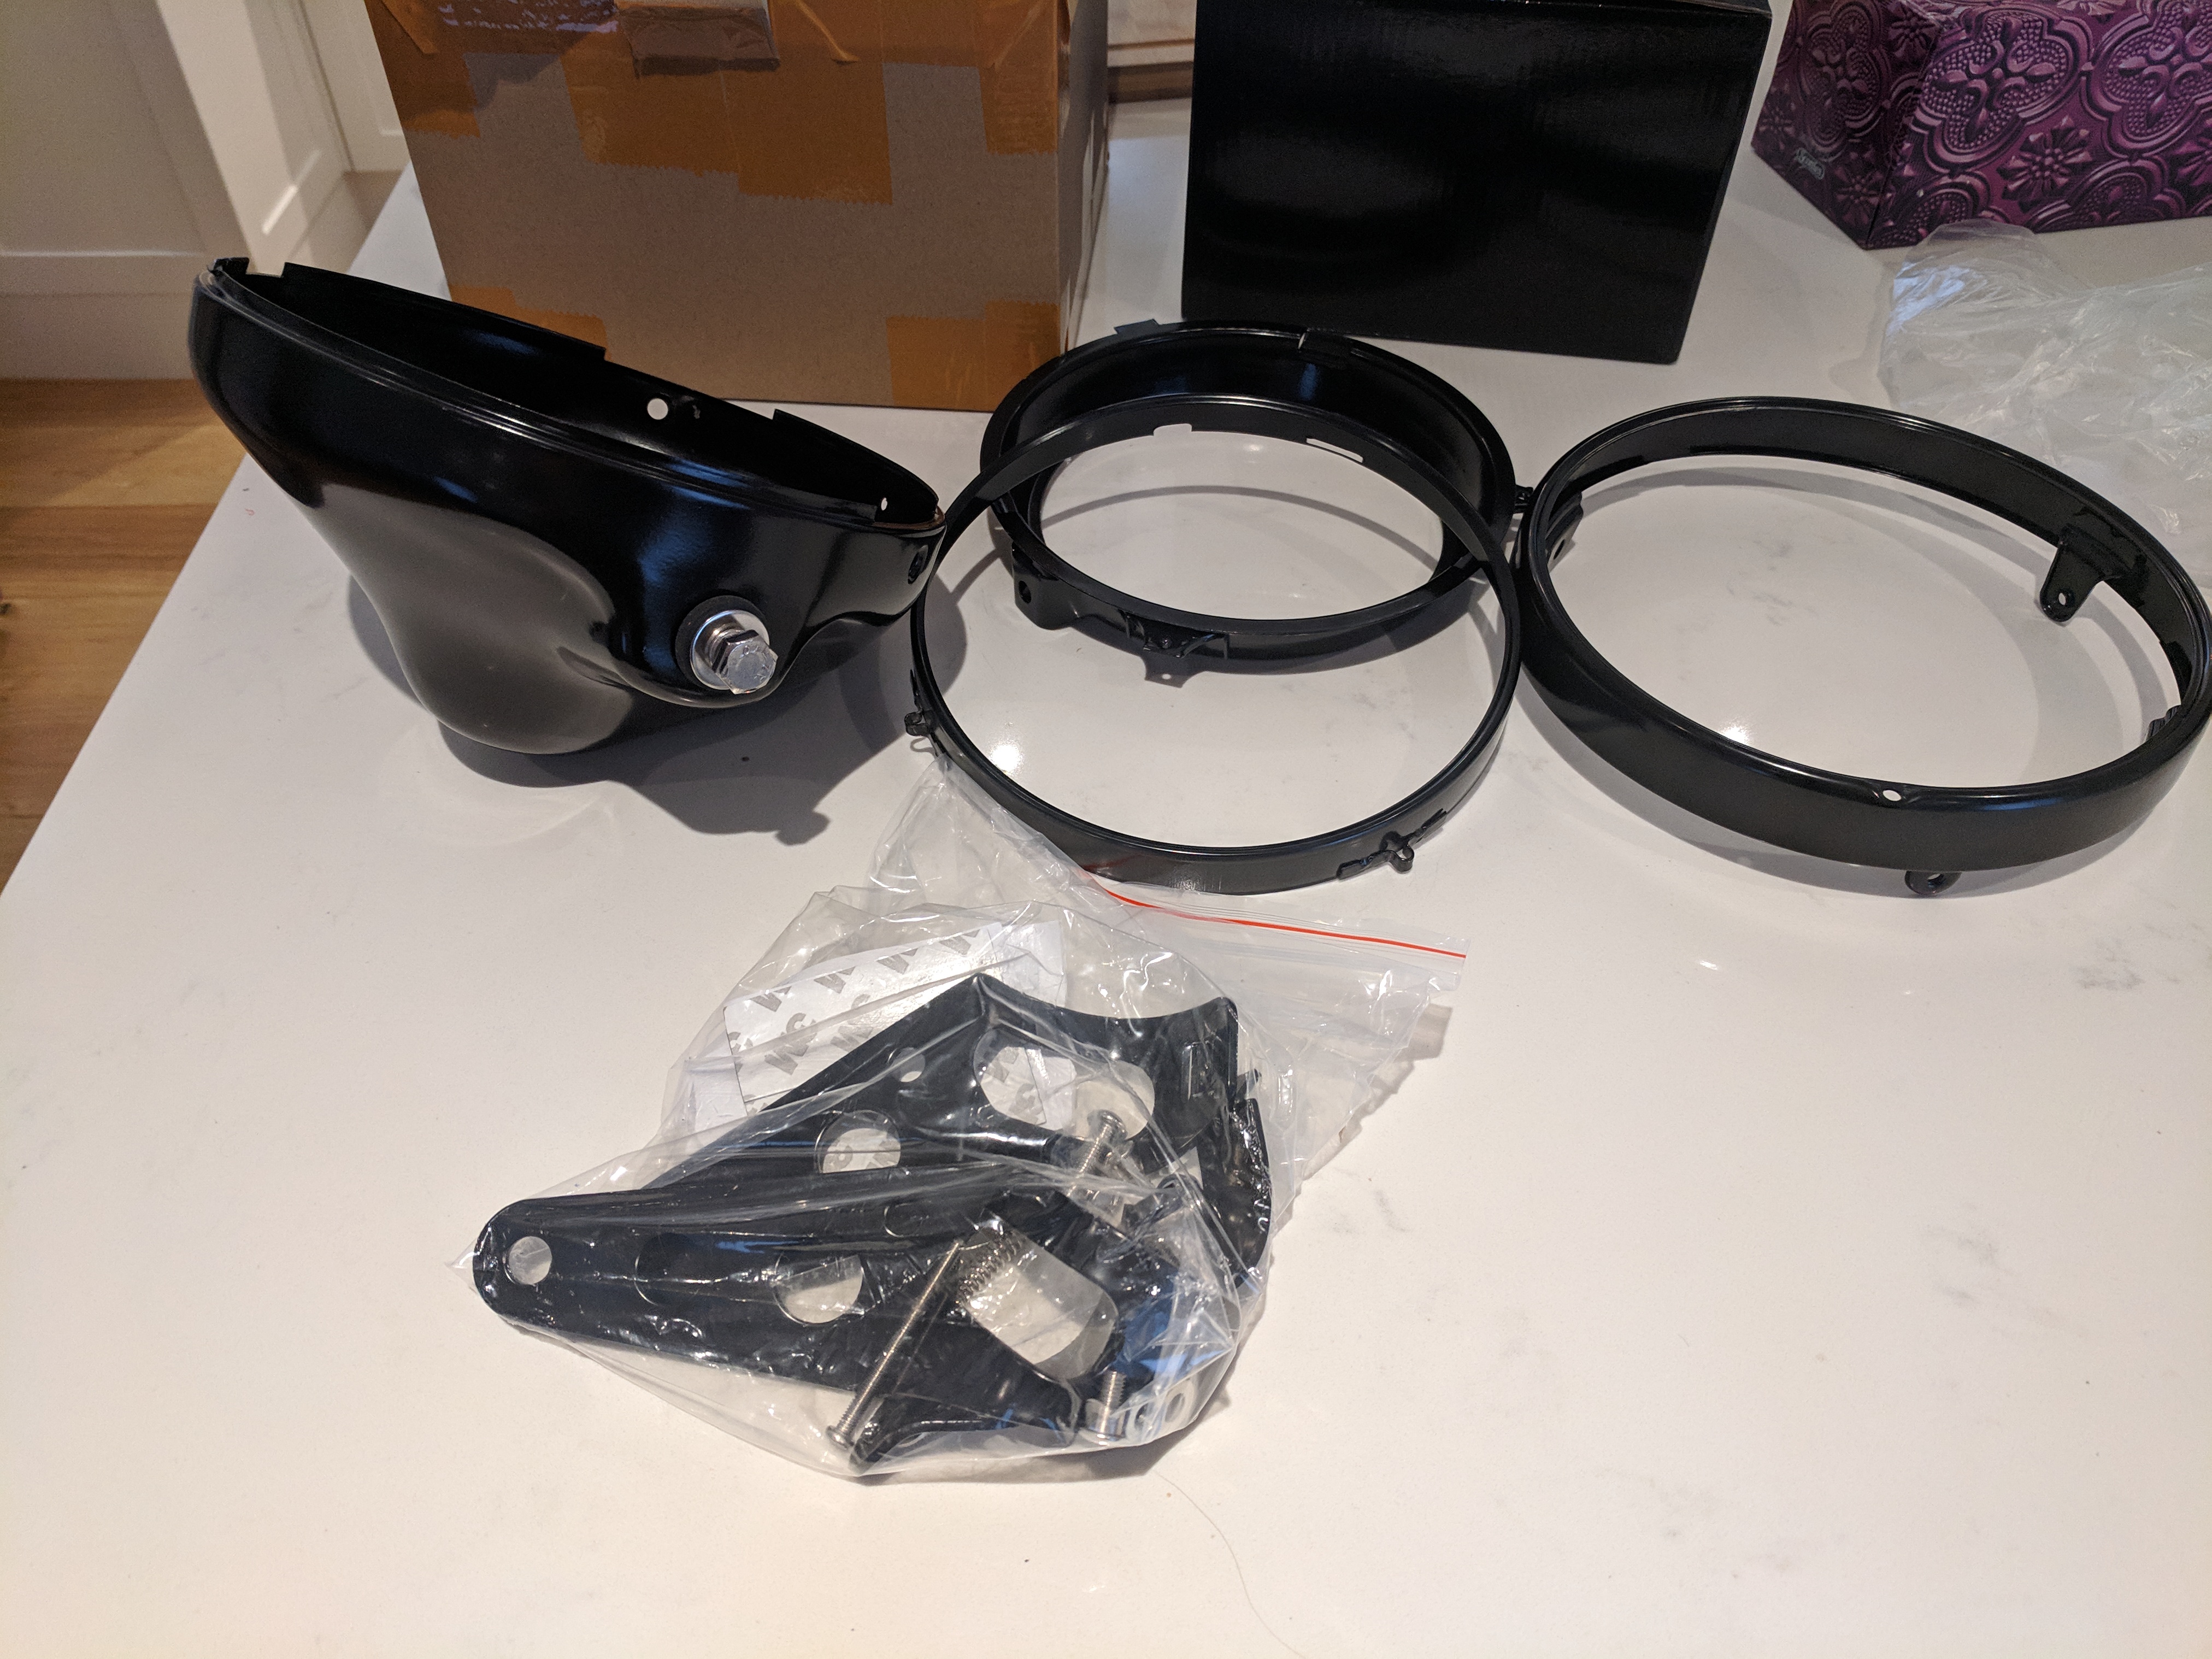
- New LED headlight
- Master fuse replacement
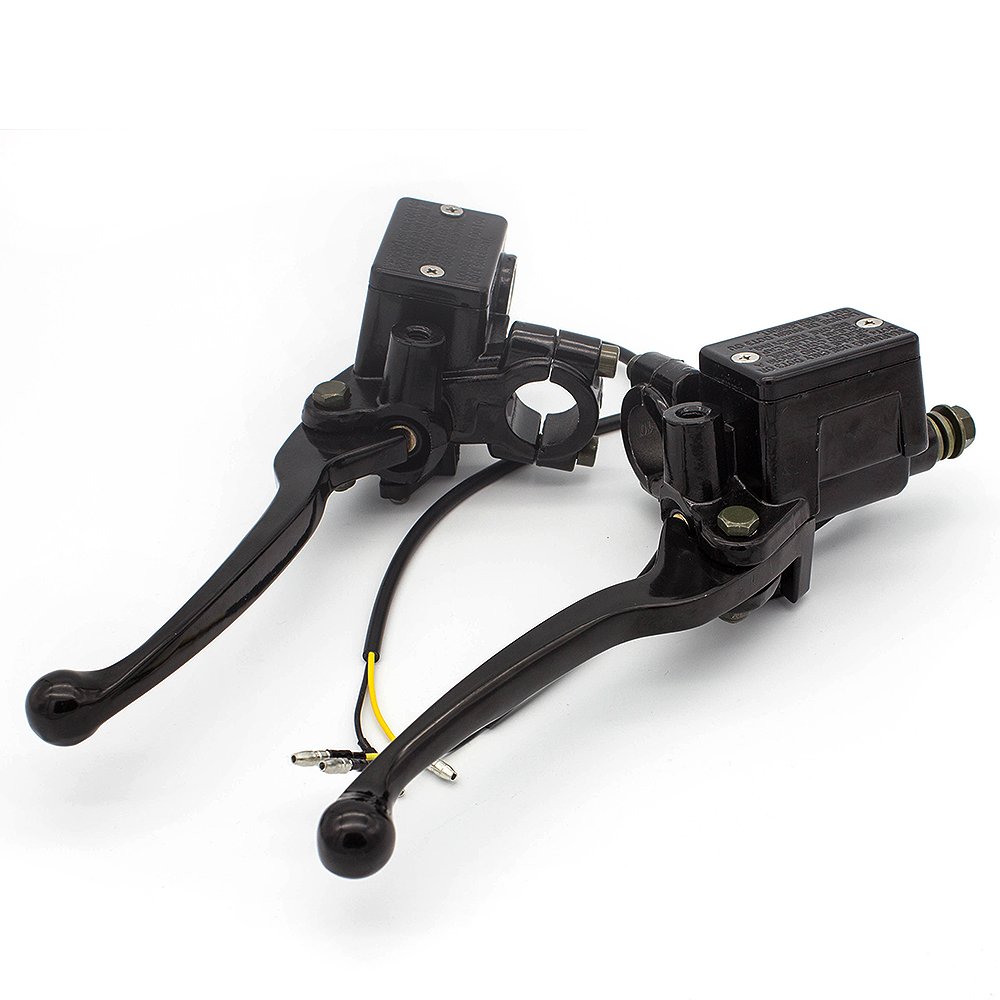
The levers were probably the easiest thing to put on from all the parts. They were more or less bolt on. Currently i still need to fill them up with some DOT4 break fluid and wire in the wires for the break light and clutch switch. Pretty straight forward stuff.
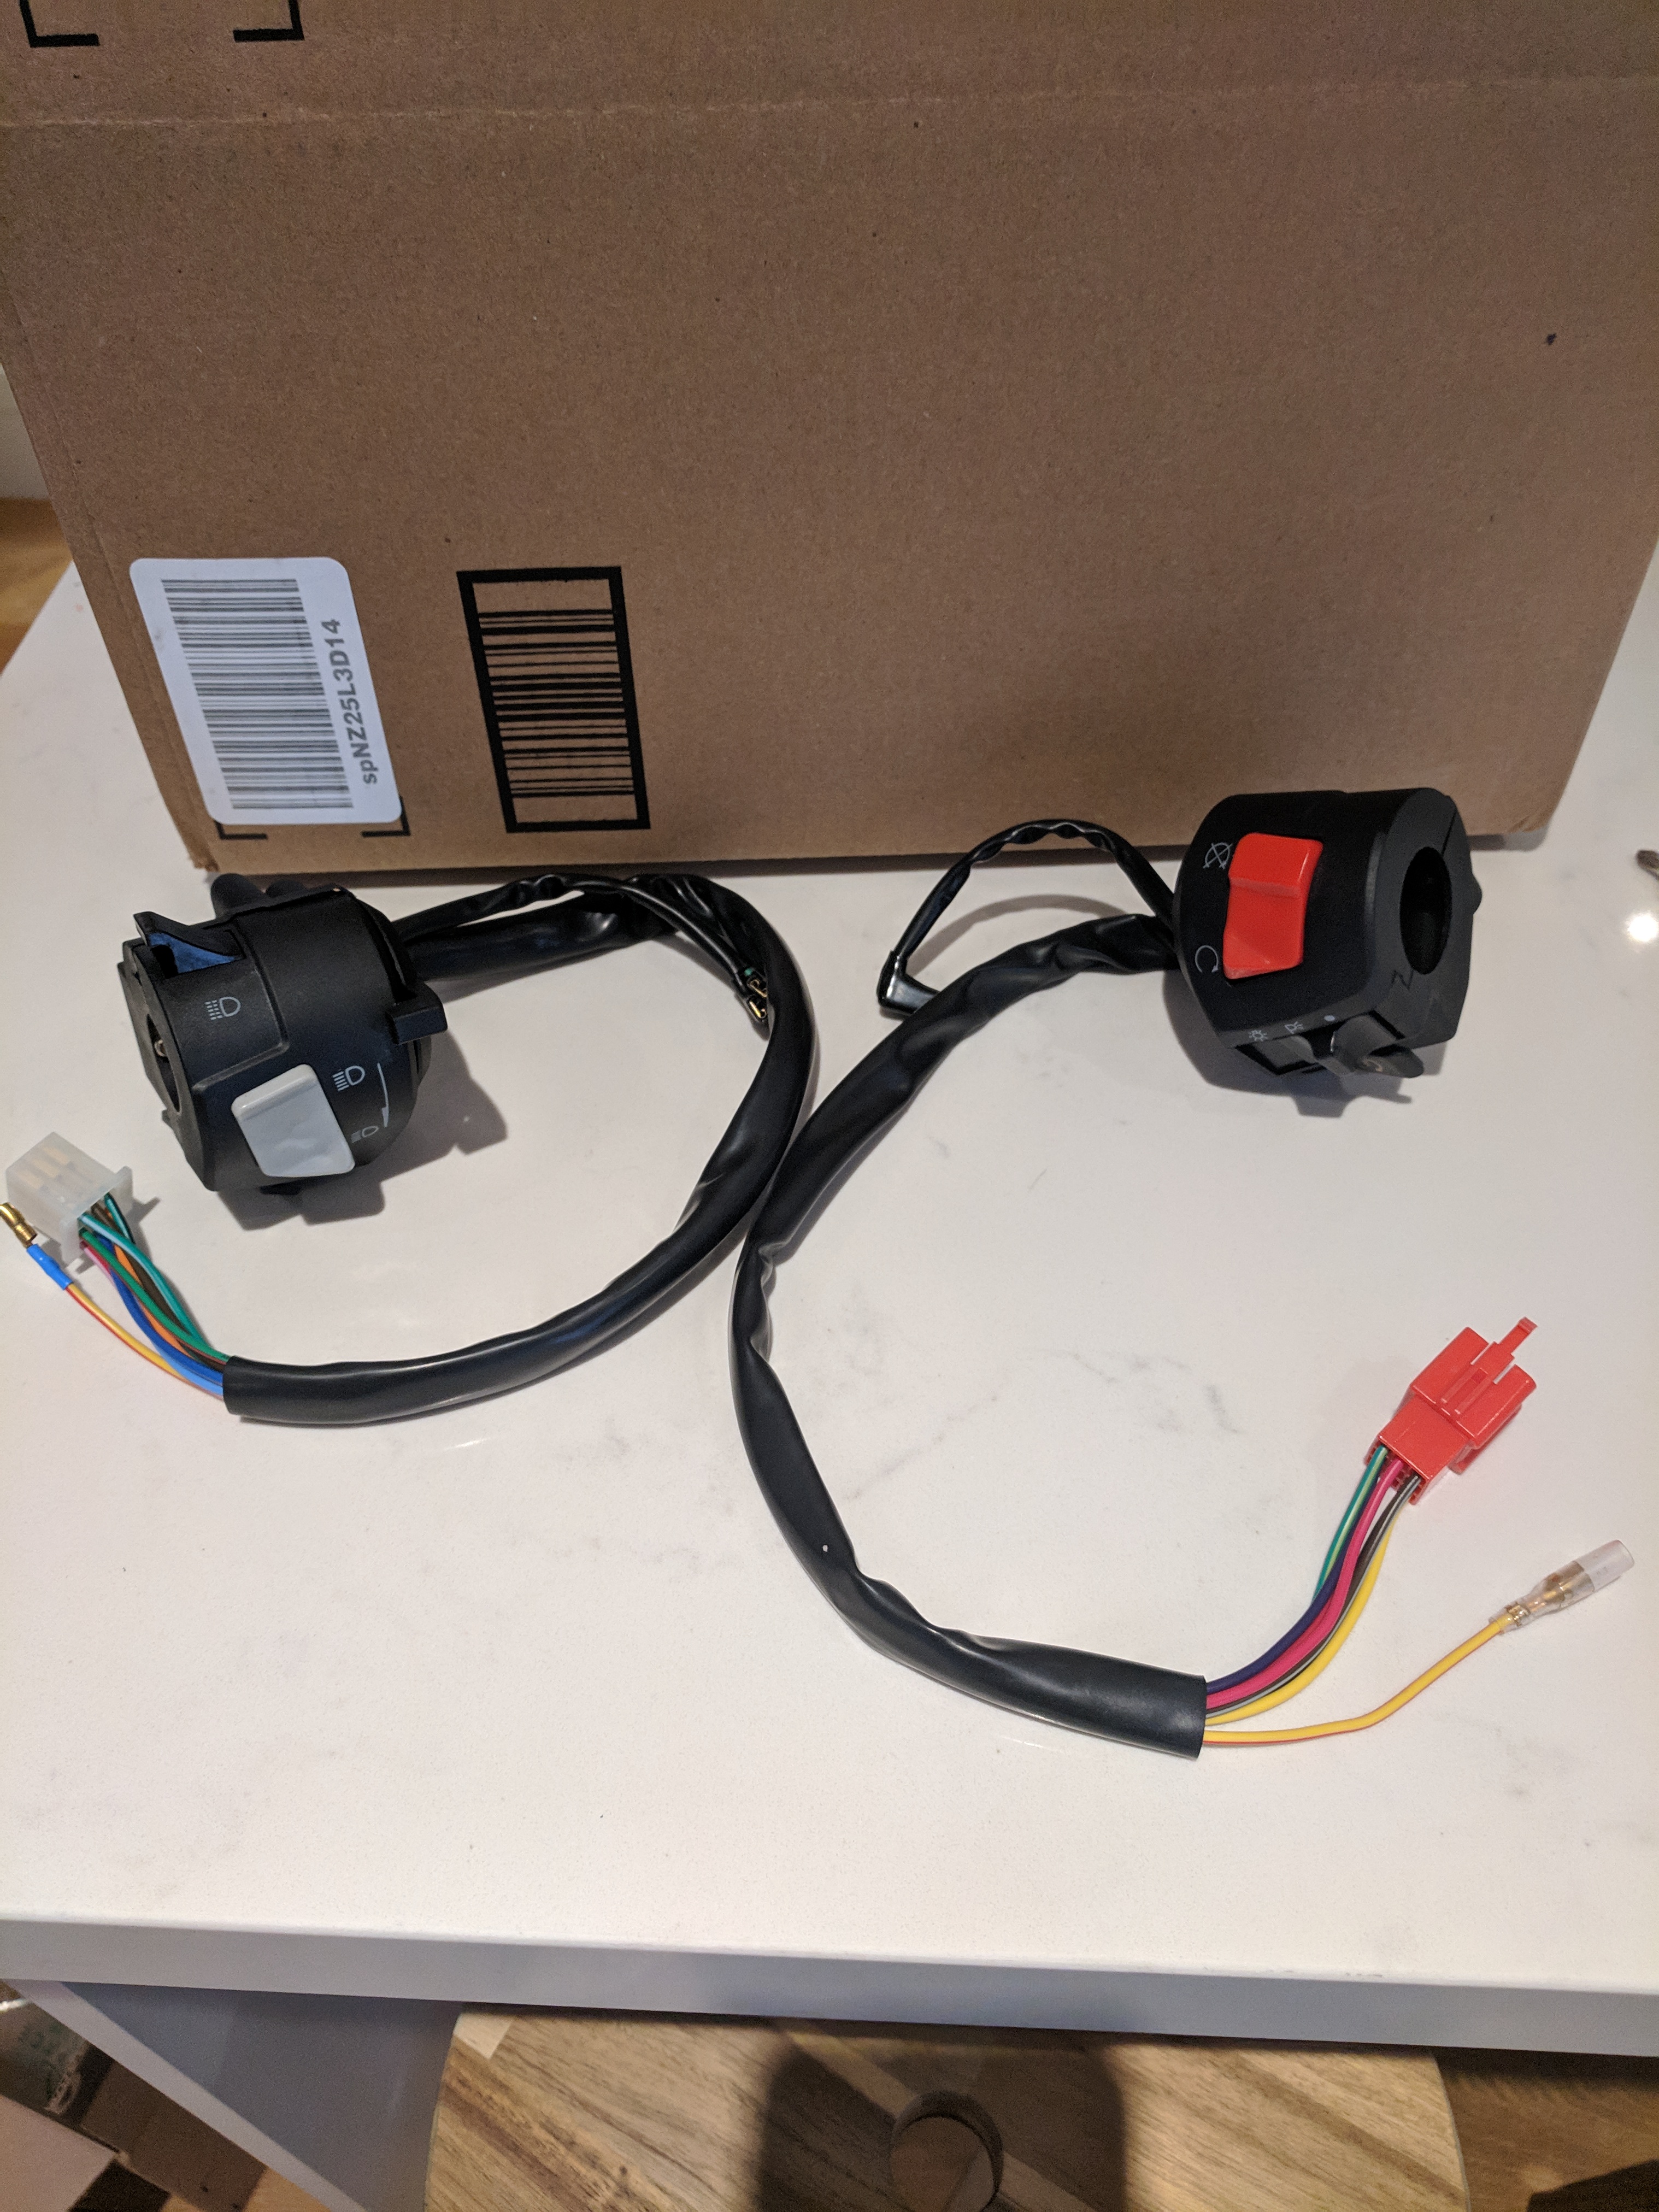
The switches are where my headaches and mistakes began. The left hand switches actually have a choke lever on them (the main reason why I bought them). When i went to test fit them the very first thing i noticed was that the choke cable that comes with the 1982 Sabre actually uses the exact same setup as the throttle cables. The lead piece at the end is the same large size. These switches however used the more modern small diameter kind. So me being the backyard mechanic and all i started to drill out the switch in order to try to fit the bigger bead in there. After pretty much ruining the piece i realized it will never work, since the thread on the switch and the thread on the cable were different diameter as well. So even if i was able to attach the bead the cable would not be screwed in.
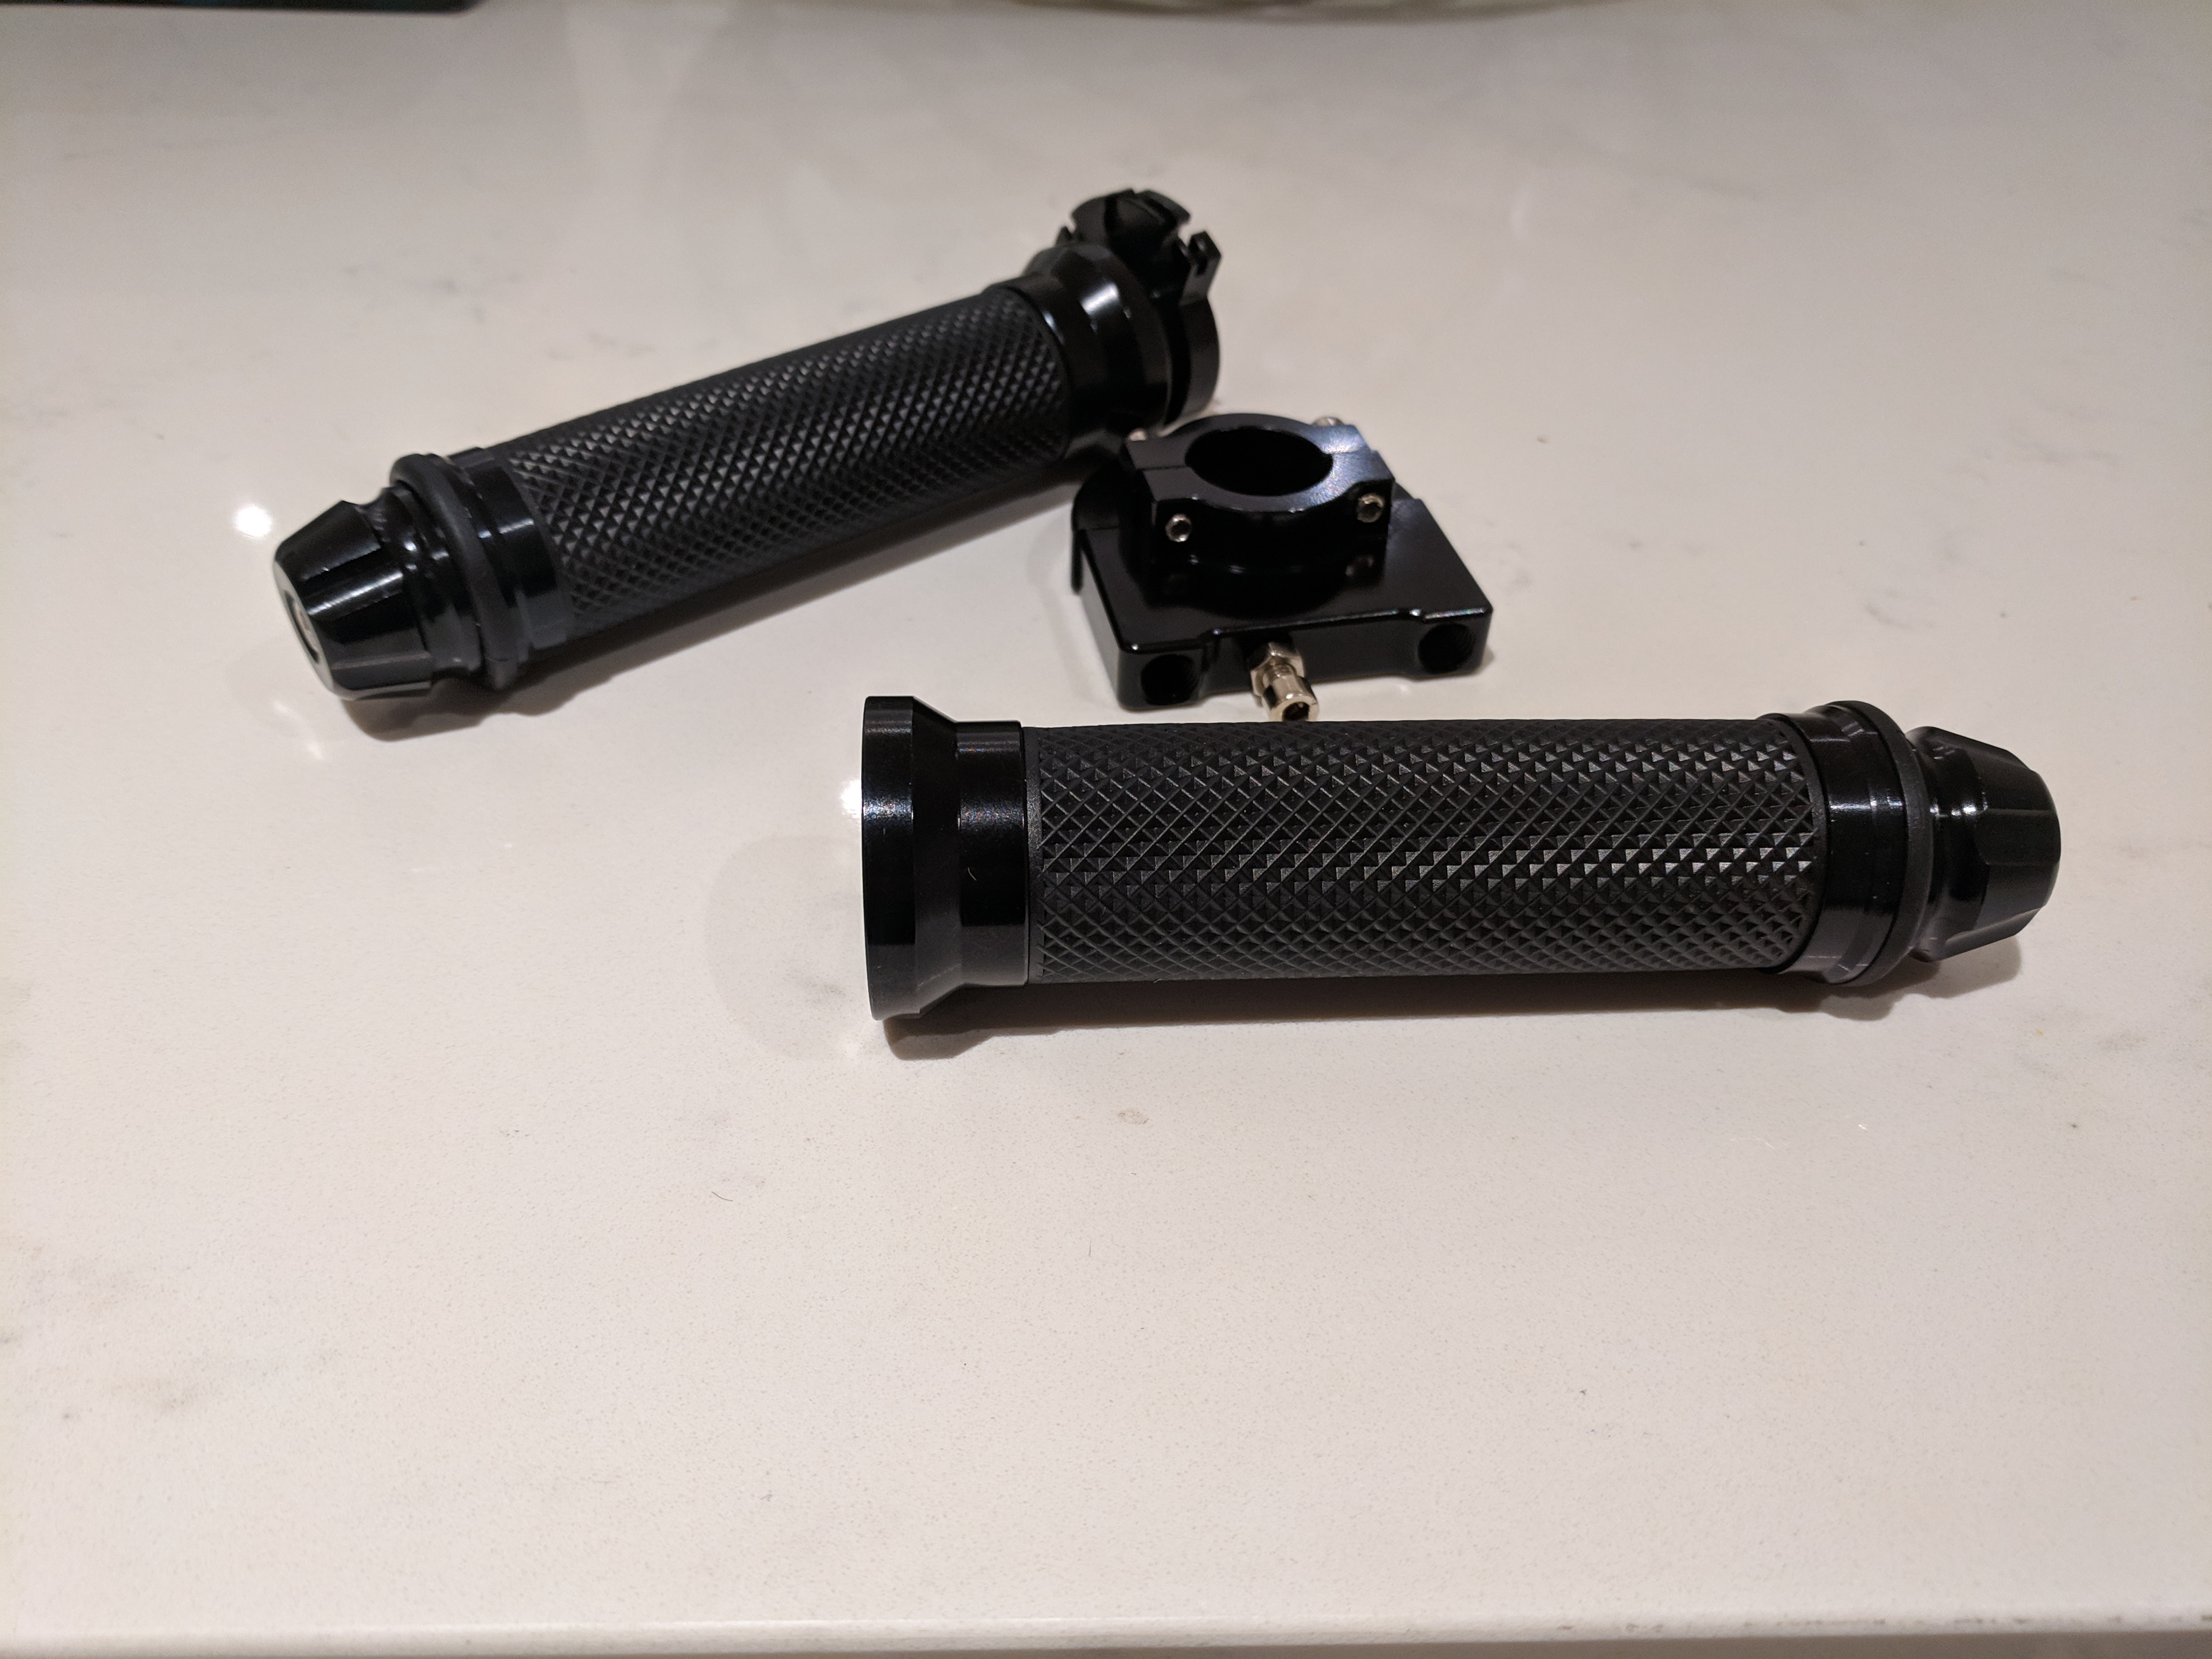
In order to not waste time I decided to work on setting up the new grips and throttle assembly instead. The throttle assembled pretty easily, however when i went to attach the throttle cables to it, i was shocked to find out that the return cable actually uses a larger thread to fasten to the throttle. So i had the genius idea to grab the primary throttle cable from the old carbs and use it as a return cable on this bike. I knew the cable had the same thread and that it would fit on the throttle assembly for sure. So I went through my pile of parts to find it, and mistakenly grabbed the choke cable first. Then to my shock and horror I realized the 1983 Sabre uses the more modern small diameter lead bead choke cable. FML! So i grabbed it and the primary throttle cable and went back to the bike to take the carbs off.
With the carburetors off I figured I might as well upgrade the internals before putting them back on as well. After pouring a bunch of gasoline on myself because i didnt drain the float bowl, I was finally able to get to the internals. I replaced the float bowl valves with the ones off of the 1983 bike. They seemed to have been replaced because they were much sprigier. I also swapped the idle jets from the size 38 (1982) to the size 40 (1983) ones. I kept the primary jets stock as I figured they dont seem to need it. Depending on how the bike runs I may or may not upgrade those as well.
Carbs ready and all I put them back on the bike. I hooked up the two throttle cables to the assembly. Then found out that no matter how much I adjust them the return cable always had an absurd amount of slack on it, which caused the throttle to get stuck open. So a quick google search revealed that the extra cable is suppose to be on there for safety should the primary cable rip and the throttle stick open. Given the throttle was sticking open with it on, i opted to remove the return cable. The spring on the carbs is strong enough to snap the throttle closed easily. So finally I had the throttle assembly hooked up and in place, now i turned my attention back to the choke.
Since I had already butchered the choke lever by drilling it, my only option was to buy another set of the same switches. Good thing they were cheap! The choke now setup, i was able to focus on wiring things up. After looking at the wiring diagrams and opening up the switches to trace which cable is what...yes they came without any instructions...I was ready to test things out. The right side switches didn't require any complex rewiring just a re-arrangement of the cables on the connector to match those on the harness.
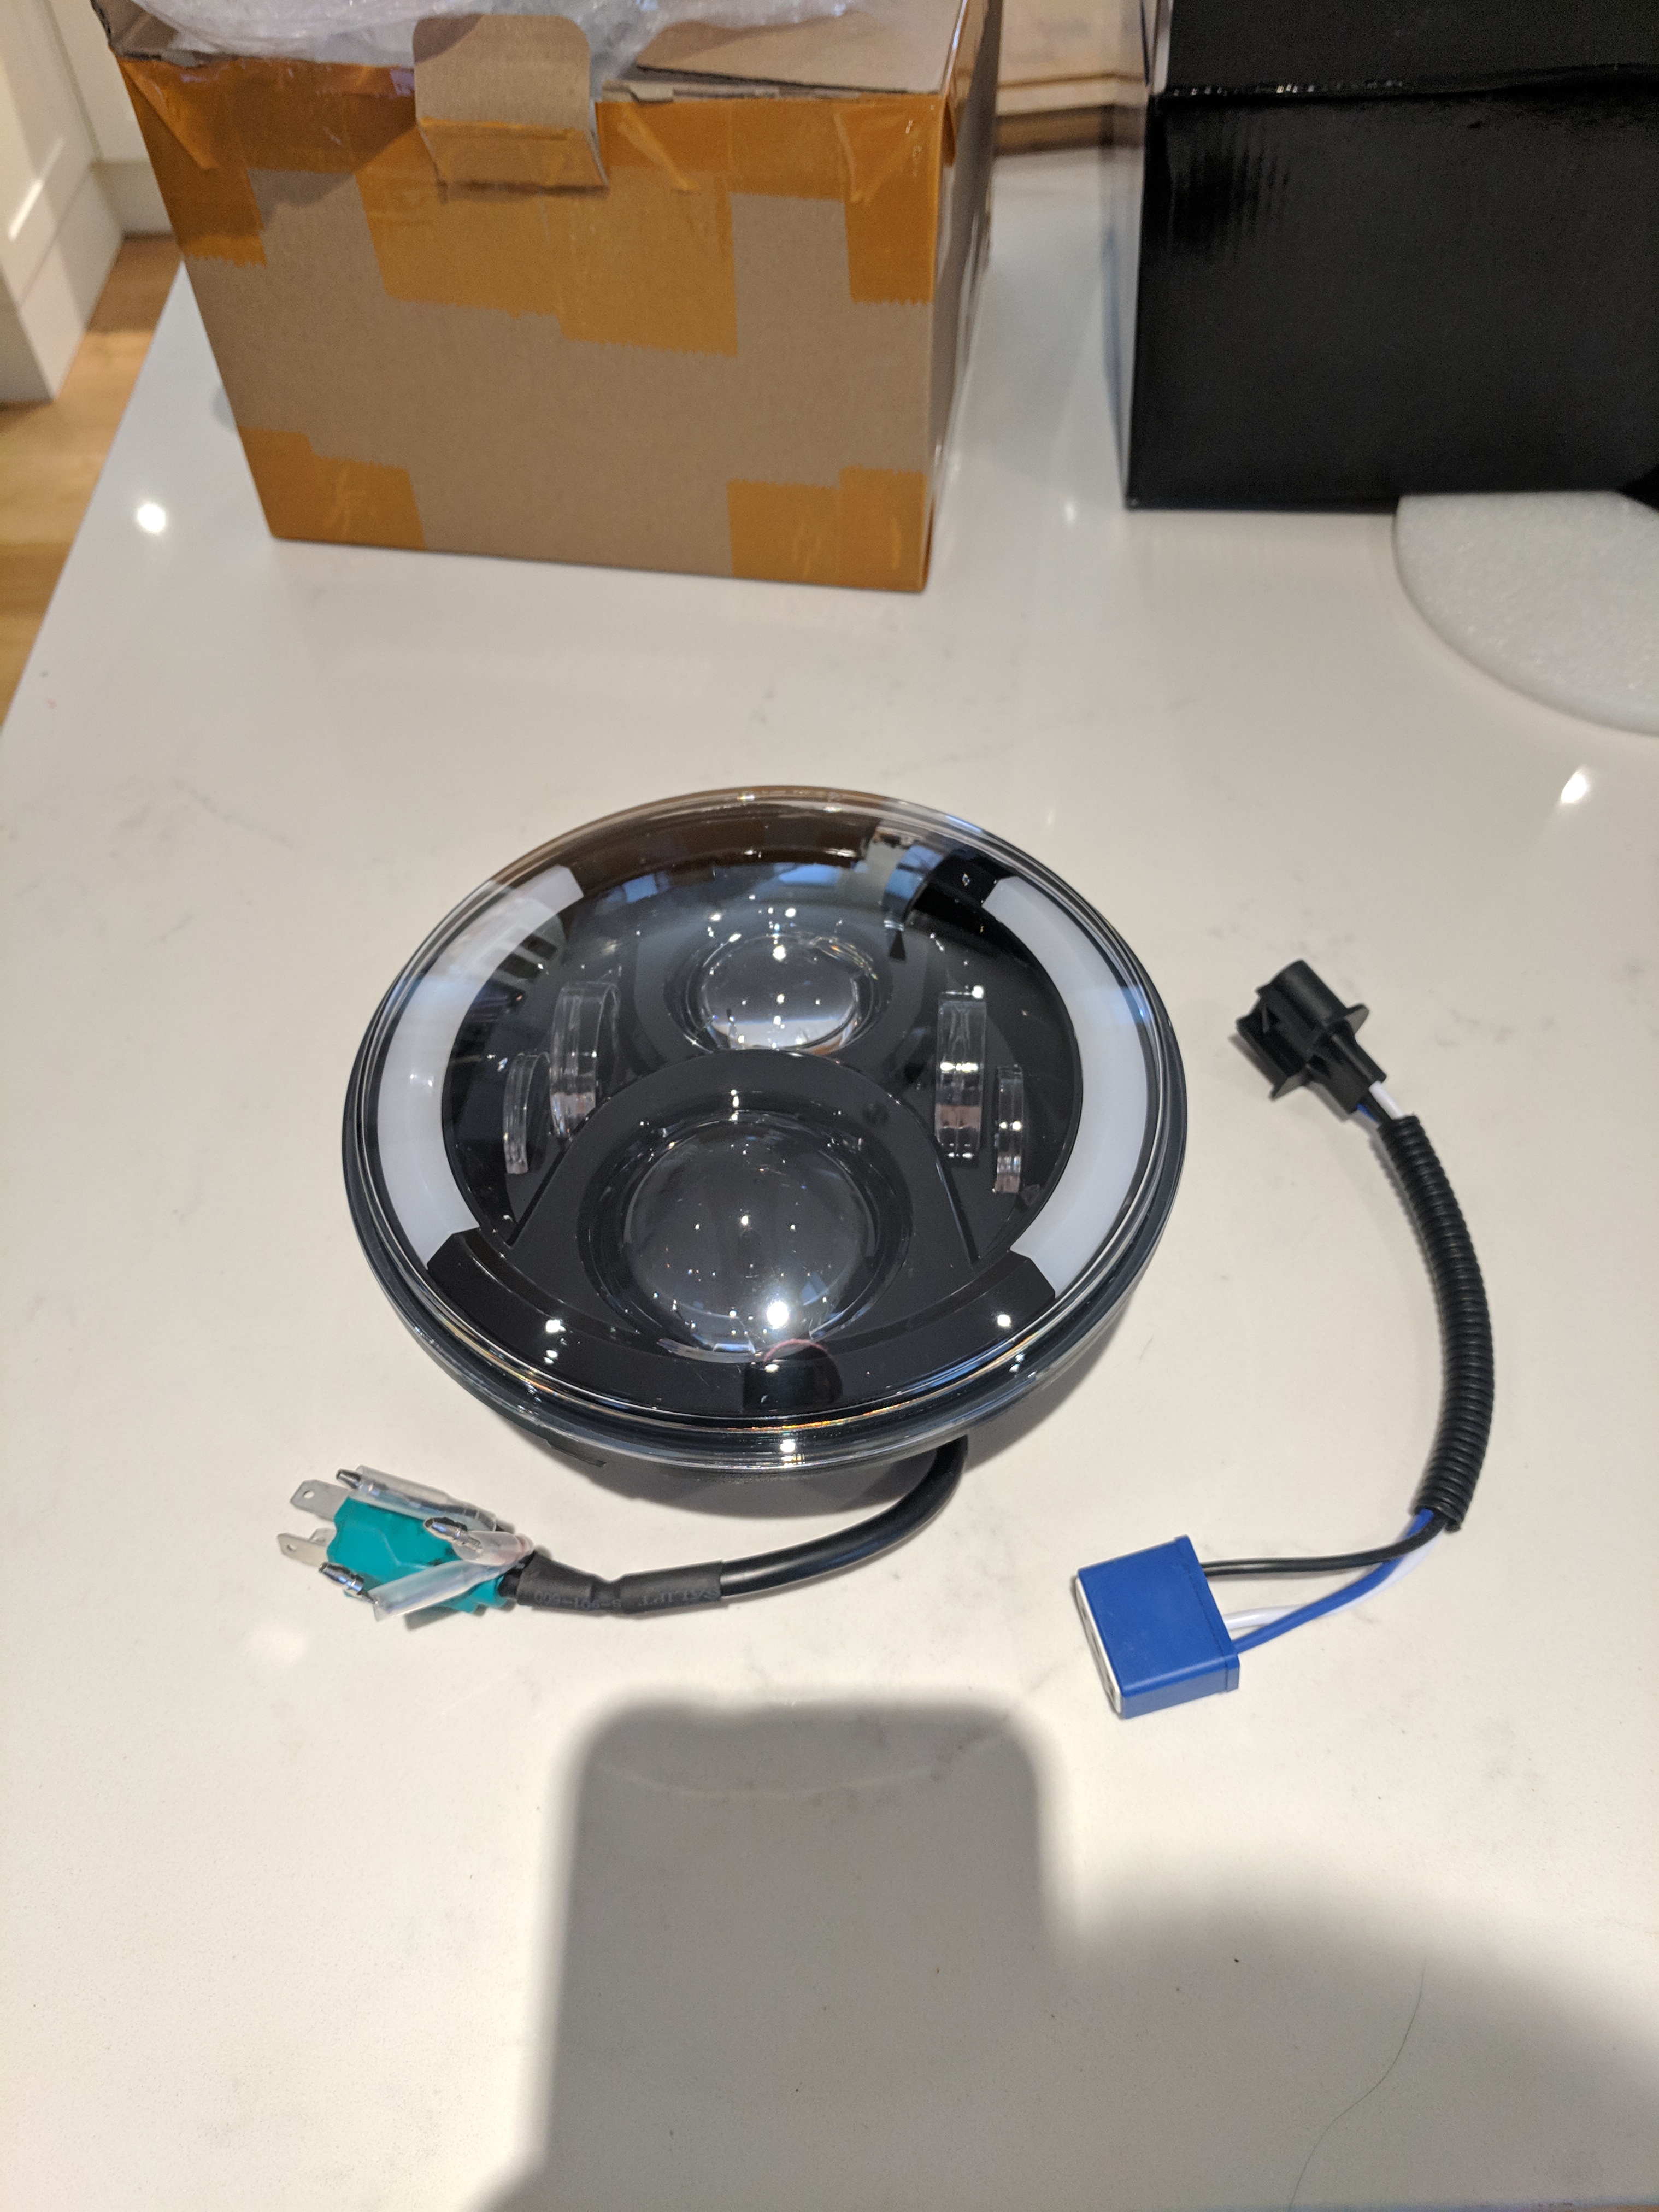
After a little fiddling with the wiring on the light, i hooked it up to the harness and the freshly wired switches. It wasn't long before i had the DLR, Low & High Beam, and the integrate blinkers all up and running.
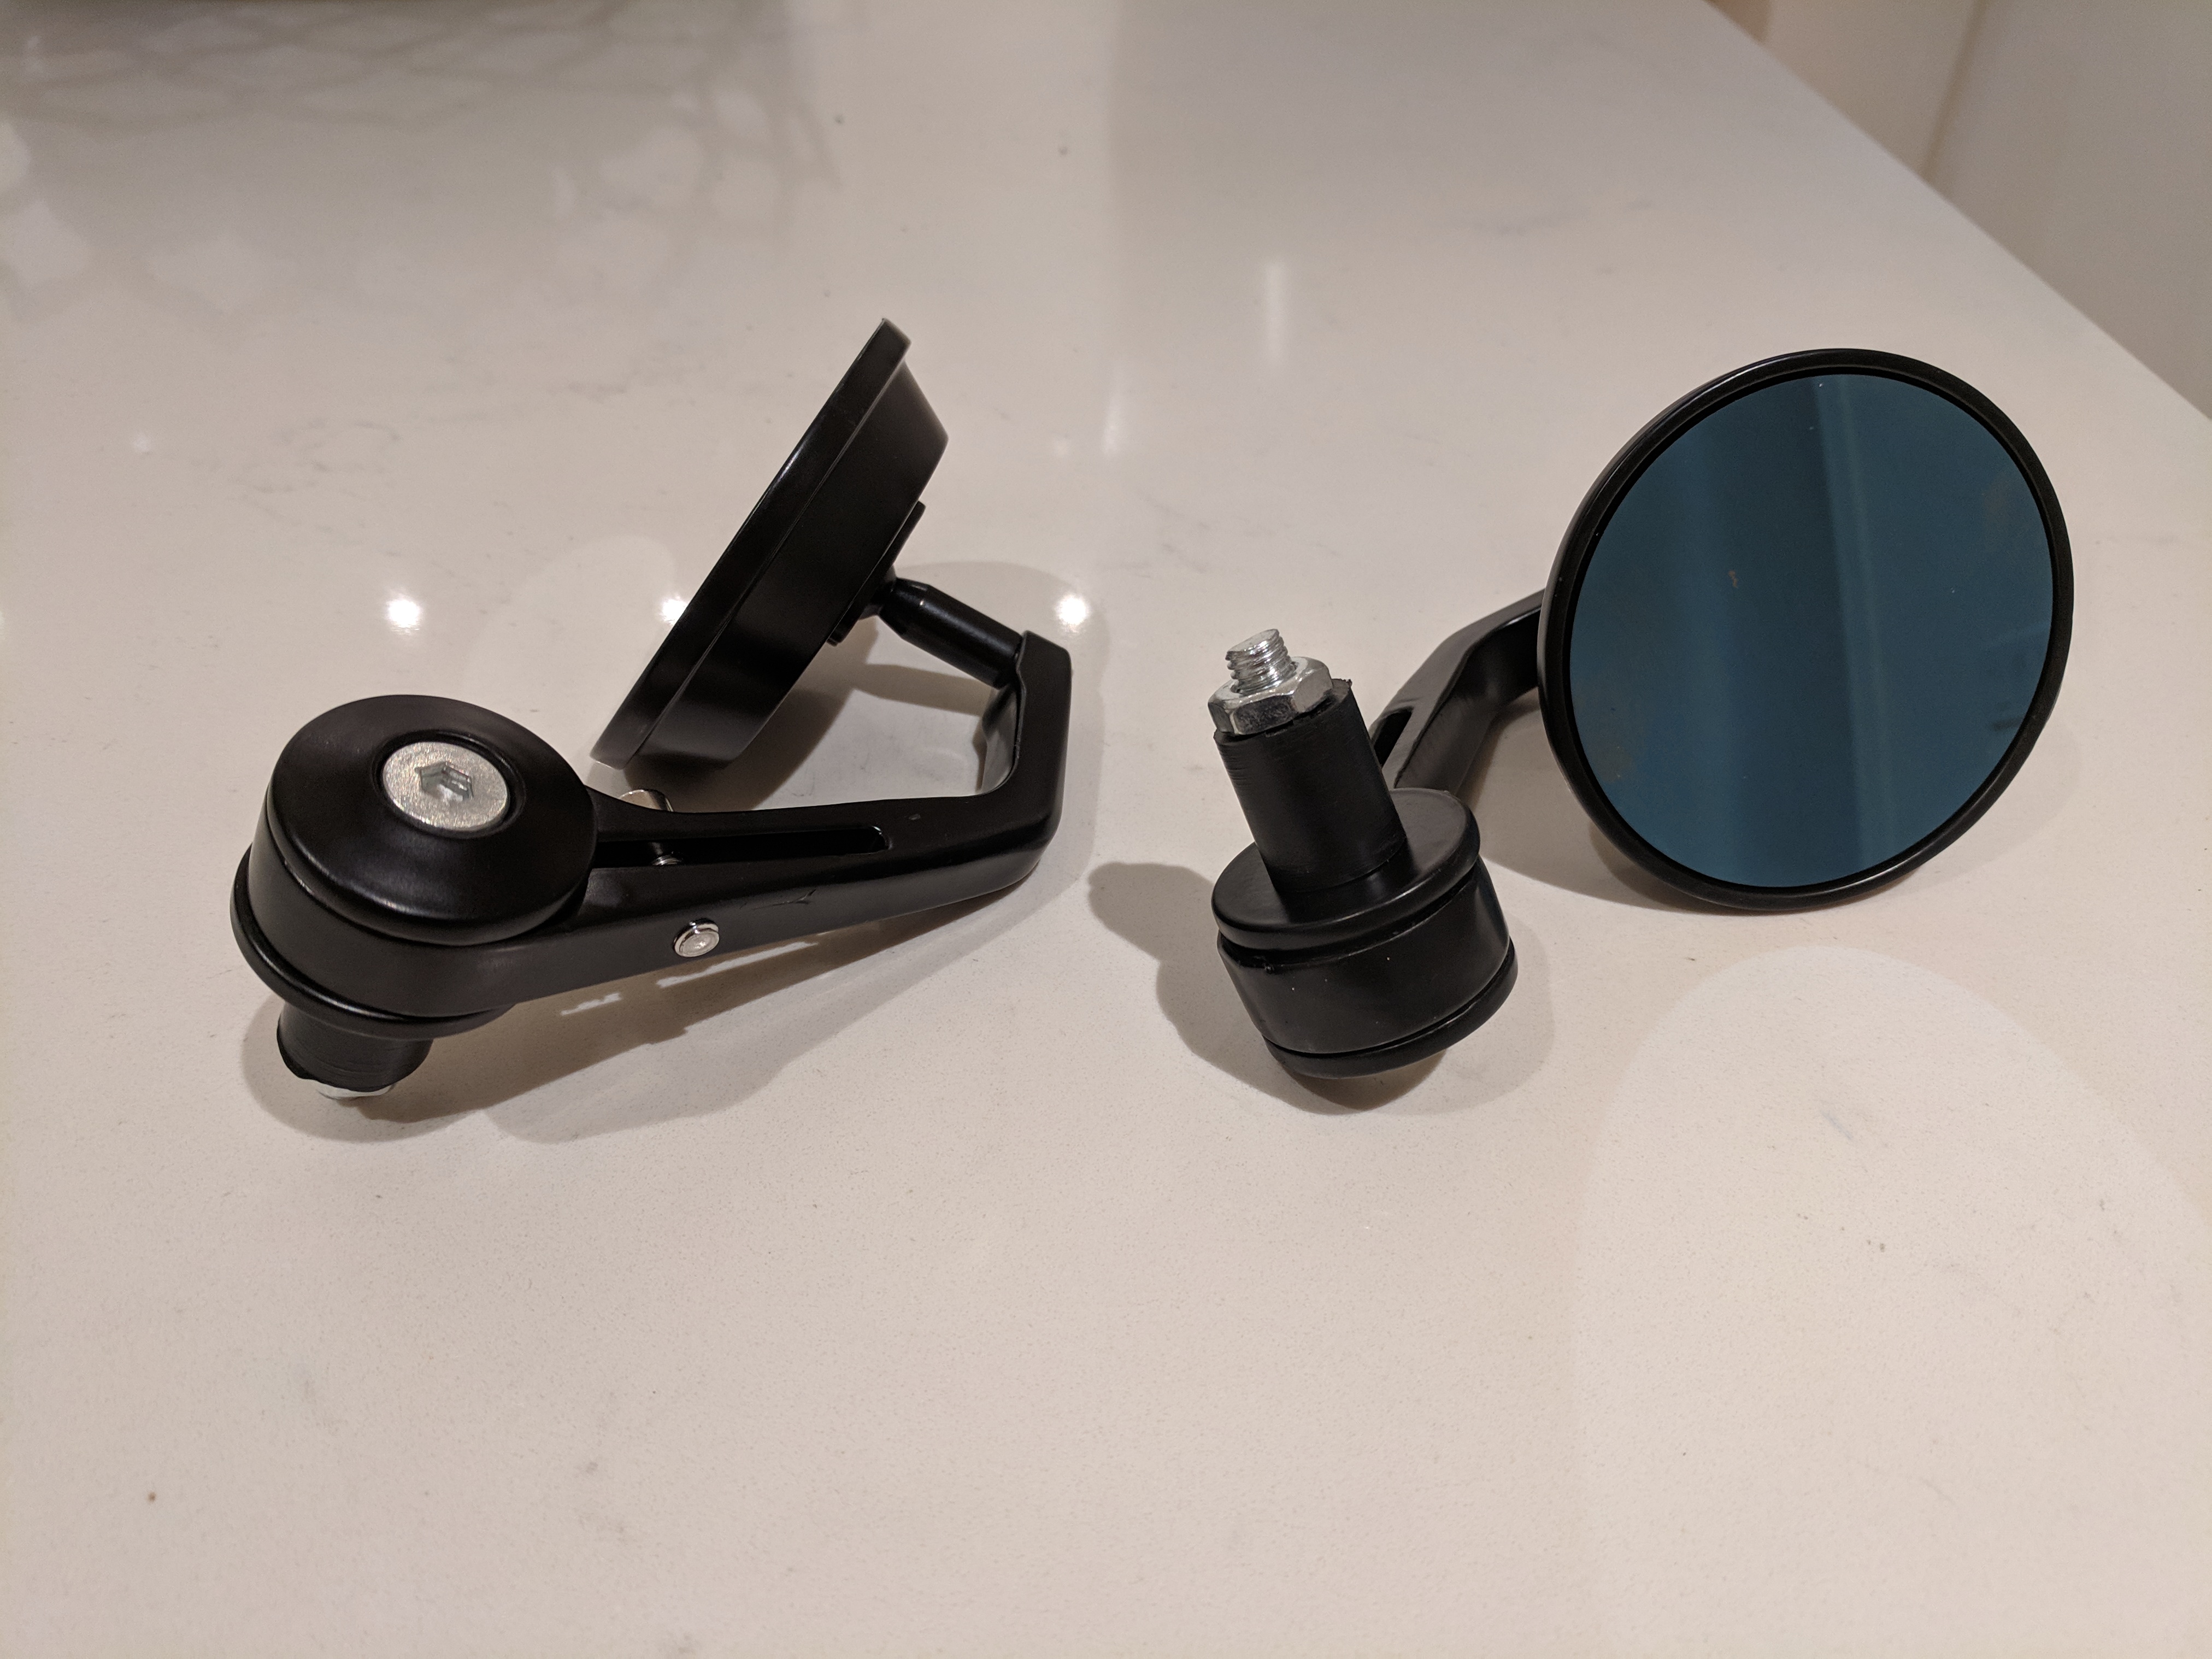
The mirrors were the next on the list to get installed. Here I had to first remove the grip sliders and cut the ends off the grips so that the bar end hardware could slide into the handle. That was easily done, however I quickly realized that the bushing that came with the mirrors was not the right size. It was far too thick to go into the handle bars. So I grabbed some 120 grit grip tape and started sanding them down a few mm in diameter. After some serious elbow grease they were finally able to fit in. I opted to mount them up side down, which depending on how things go may or may not be their final layout. I noticed that under wide open throttle my hand would cover the right mirror completely if it hangs down. We will see how it goes.
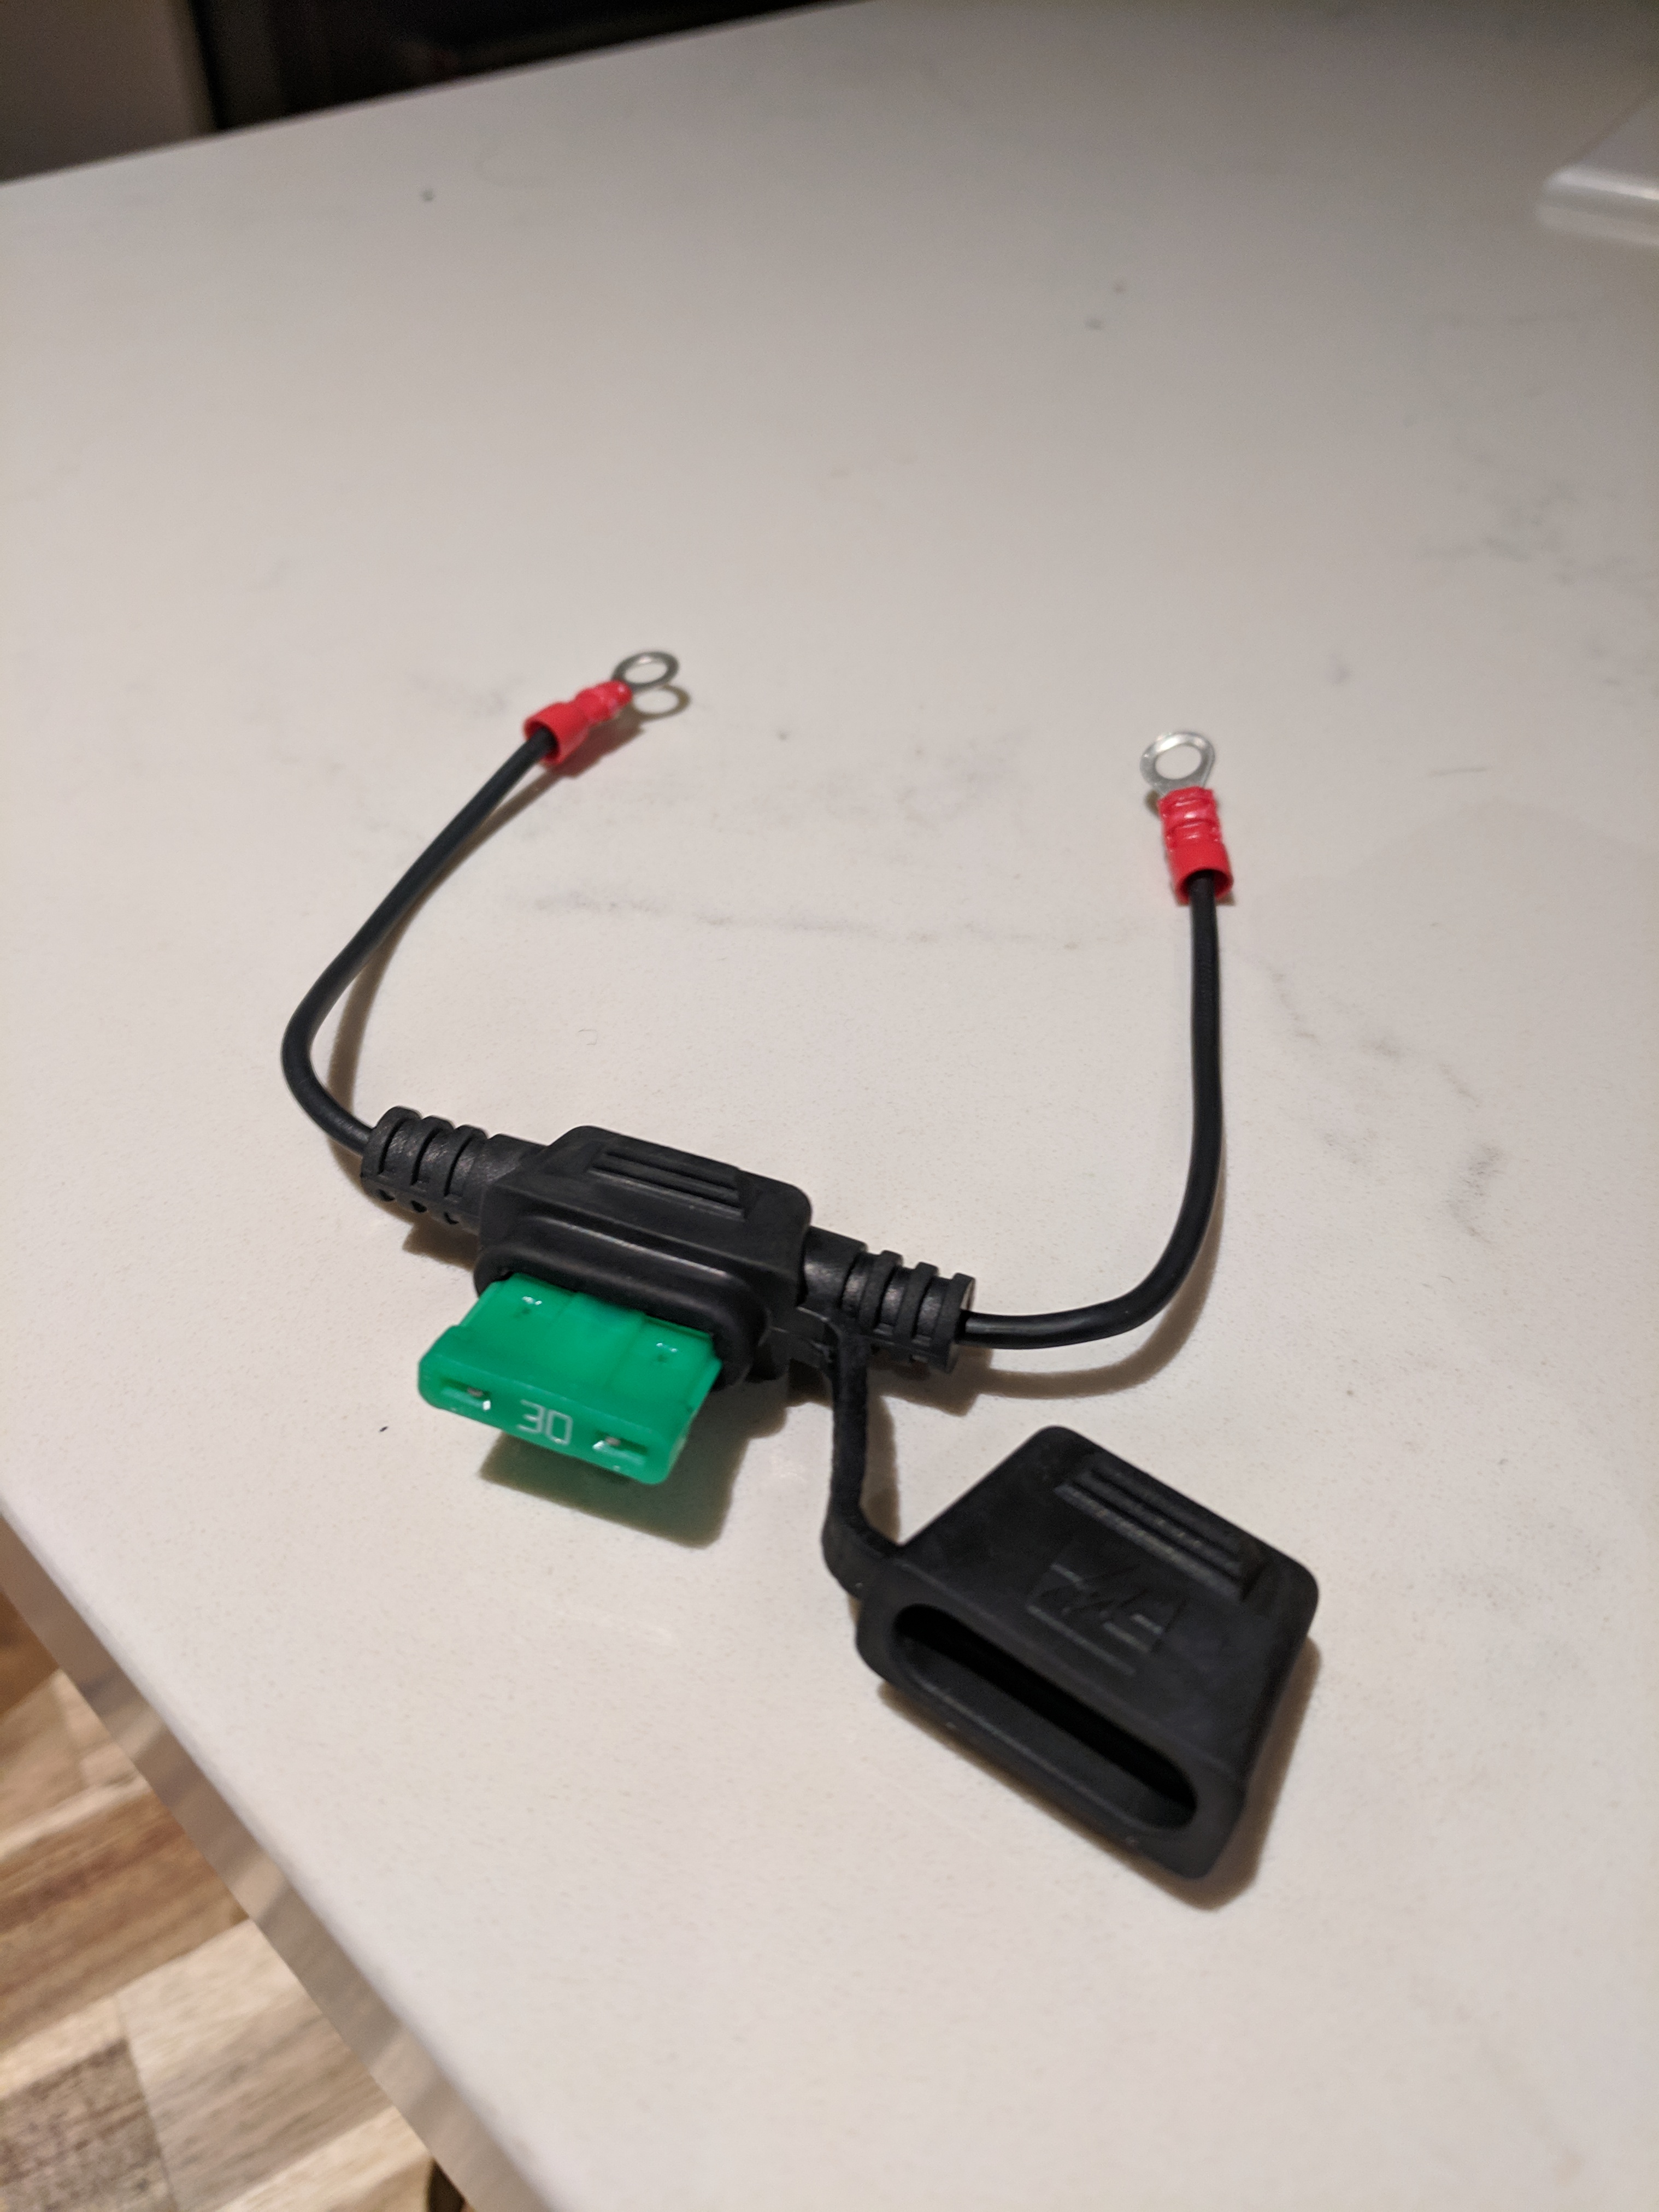
Since the master fuse on the bike was burnt out, I bought a little weather proof inline fuse kit. I clamped on some terminal rings on the ends of the cables and bolted it in place of the old dog bone fuse. It was time to fire this baby up.
The bike was able to start only once, however after about 5min running I realized that i was running on 2 cylinders only. So I shut it off. I never started back up. Upon further investigation I found out that the bike was just not creating sparks and was just being flooded with fuel. Funny enough when i was trying to video tape the way the headlight works I also noticed that the turning signal relay was not firing. They were not blinking. So I have deduced my major engine issues to a shitty old battery.
Next on my list of things are the following:
- New Antigravity 12 cell Lithium Ion Battery
- New Rick's Motorsport Electrics Rectifier (in order to not melt things with the modern battery)
- New Speedo & Tachometer Combo
- Fire the engine back up
- Synchronize the carburetors and fine tune them
Stay tuned.